
The next order calls for a 750 mL bottle. You’ve been running 500 mL all morning, and somebody has brought the replacement mold over. But where are the matching handling parts? This is the sort of delay a PET blow mold changeover checklist should catch before the machine stops.
Take a planned rate of 12,000 bottles per hour: losing 15 minutes leaves room for 3,000 fewer bottles in that shift. Trial rejects would come on top of that.
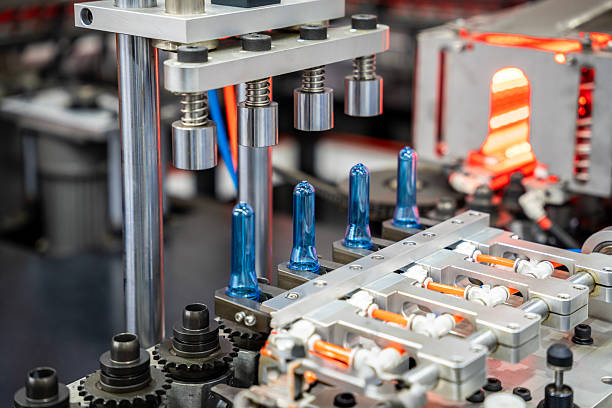
Quick Answer: What a Changeover Checklist Covers
- A PET blow mold changeover splits into three blocks: confirm the format before the machine stops (bottle and preform spec, handling parts, machine compatibility), swap the tooling (mold out, locating surfaces clean, mold in and aligned, cooling and air reconnected), then validate (settings loaded, first article measured and approved).
- Most of the lost time is not the swap itself. It is handling parts that were never checked, preform specs that were assumed, and settings loaded from memory instead of the format sheet.
- First-article validation is the block that protects the next shift: dimensions, wall thickness, neck finish and function checked against the drawing and recorded before the line runs at rate.
Why Multi-Format Changeovers Need a Standardized Checklist
Common Challenges When Switching Bottle Formats
Two bottles marked with the same neck diameter aren’t necessarily using the same neck finish. And keeping the preform doesn’t guarantee that handling parts can stay. These are awkward discoveries to make with the machine already stopped.
What a Good Changeover Checklist Should Achieve
The checklist needs names against the checks, with room for actual results. Otherwise the next crew inherits “it ran fine yesterday” and has to work out the rest. A good record saves that repeat investigation.
Pre-Changeover Checks: Confirm the Bottle Format and Machine Compatibility
1. Verify Bottle and Preform Specifications
- Match the bottle drawing revision to the production order.
- Check height and diameter against the drawing. Include the base
> shape.
- Confirm preform dimensions and weight. Match the neck finish and
> support ring to the handling system.
- Separate nominal capacity from brimful capacity. A 500 mL label does
> not define the bottle’s overflow volume.
2. Check Blow Molding Machine Compatibility
Use the exact machine model and configuration. Verify mounting dimensions and locating interfaces against the mold drawing. Check cavity count and opening clearance too. A familiar machine brand alone does not establish compatibility.
3. Prepare Tools and Changeover Parts
Lay out the tooling while production is still running. That includes the connectors and any replacement seals, not just the mold. A split hose spotted here won’t interrupt installation later. The released recipe and inspection sheet belong with this job too.
PET Blow Mold Changeover Checklist: Step-by-Step Procedure
Step 1. Stop the Machine and Follow Safety Procedures
This part belongs to trained personnel working from the machine manual and site lockout/tagout procedure. A stop button alone isn’t energy isolation. Before access, verify that the required supplies are isolated and stored energy is released or secured. Trapped air pressure counts. So do hot surfaces and assemblies that could still move.
Step 2. Remove the Existing Mold and Inspect the Mold Area
Use the specified support and lifting method for removal. With the mold out, there’s a chance to see dirt or damage that was hidden underneath. Clean the seating and locating surfaces before inspecting them. A damaged clamp needs attention now; fitting another mold won’t make that problem go away. Record the finding.
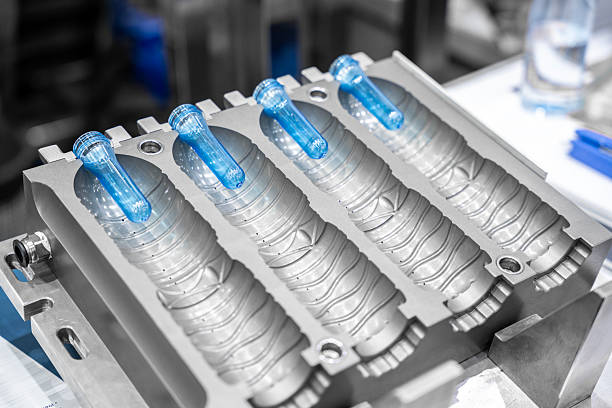
Step 3. Install and Align the New Blow Mold
Read the mold ID against the order before it goes into the machine. Check orientation and matching base parts as well. For seating and fastening, follow the equipment requirements, including torque. Any movement check must use the approved setup procedure. Binding is a reason to stop and investigate, never to tighten harder.
Step 4. Reconnect Cooling, Air and Supporting Systems
Match each cooling hose to its identified circuit. A coupling that clicks into place tells you little about water flow, so verify flow and leaks using the specified checks. Look at hose routing through the permitted movement range. Leave no stretched or pinched sections. Applicable air connections and sensors also need checking.
Step 5. Load and Verify the Correct Process Settings
A recipe called “750 mL” could belong to an earlier bottle revision. Open the released file for the actual bottle/preform combination and compare its values with the approved record. Heating zones and rod travel need review, as do blow pressure and timing. Check cooling settings before deciding which adjustments the trial needs.
Step 6. Run a Controlled Trial and Check Machine Operation
The authorized restart includes restoring guards and properly releasing isolation. In the manufacturer’s trial mode, follow a bottle through release and transfer. Does it leave cleanly? Is anything catching? Work towards production speed only as permitted. Write down changes as you make them, and keep trial output out of the approved batch.
| Block | What to verify | Sign-off |
|---|---|---|
| Pre-changeover | Bottle format, preform spec, handling parts, machine compatibility | Planner and setter |
| Mold out | Locating surfaces, waterways, no damage to mold or platen | Setter |
| Mold in | Alignment, clamping, cooling and air connections | Setter |
| Settings | Recipe loaded and checked against the format sheet | Process engineer |
| First article | Dimensions, wall thickness, neck finish, function on the drawing | QC and production |
First-Article Validation Before Full Production
1. Inspect Bottle Dimensions and Appearance
Keep the cavity number with the bottle you’re measuring. Check dimensions against the drawing and wall thickness at the agreed locations. Whitening or scratches deserve a closer look. Try the bottle on a flat surface too; a rocking base is easy to miss while holding it.
2. Verify Functional Performance
Check capacity and closure sealing. Apply pressure testing where required. For bottle top load testing, use agreed specimen conditions and acceptance limits. Then follow samples downstream. Getting a good bottle out of the mold doesn’t settle whether it will travel through packing without catching.
3. Approve and Record the Trial Run
Record actual settings with the sample results and get the required quality sign-off before release. Keep a rejected sample or a photograph if it explains a correction better than words. That can be useful when this format returns weeks later.
Common PET Blow Mold Changeover Mistakes to Avoid
- Skipping compatibility checks: Now the line is stopped with a
> mold that won’t fit.
- Using the wrong recipe: Time goes into correcting settings that
> shouldn’t have been loaded.
- Ignoring cooling seals: A small leak interrupts a trial that was
> nearly finished.
- Rushing inspection: Unapproved bottles reach packing before a
> weak base is noticed.
Do not solve these problems by asking everyone to hurry. Put the missing check into the procedure and retain the corrected settings.
How to Standardize Changeovers Across Multiple Bottle Formats
Build a Repeatable Mold Changeover System
Give every format its own file, with the mold ID linked to approved samples and the correct recipe revision. Add notes about repairs after removal. When ordering custom PET blow molds, settle machine interfaces before manufacture. Include any handling changes needed across the complete blowing and filling system in that discussion.
Frequently Asked Questions
How long does a PET blow mold changeover take?
There isn’t one reliable time for every machine. Tooling and crew experience affect it, and quality approval takes time too. Count through to stable approved production.
What should be checked before installing a new PET blow mold?
Match the mounting and locating details to your machine. Verify service connections and clearances. Energy isolation must be completed before anyone accesses the tooling.
Does changing bottle formats require new process settings?
Expect to review the recipe. Some values may carry over; others will need adjustment. Keeping the same preform doesn’t remove the need for trials.
How long should a PET blow mold changeover take?
Plan by blocks rather than by memory: the mechanical swap, reconnecting services, and first-article checks. A trained crew working from the same checklist removes the searching and re-work that stretches changeovers, and the recorded times tell you where to improve next.
What is first-article validation in blow molding?
It is the check run on the first bottles from the new mold: dimensions against the drawing, wall thickness at the agreed points, neck finish and support ring, plus function. Production only starts at rate once that article is approved and the result is recorded.
Prepare Your Next PET Blow Mold Changeover with Confidence
Keep this PET blow mold changeover checklist with the format records. Check compatibility before shutdown and validate bottles before release. Planning another format? Send us your bottle drawing and machine model at HEYAN TECHNOLOGY. Include target output and preform specifications so we can assess the mold and system requirements together.
